Business
Creating the Perfect Life-Size Barbie Box: A Comprehensive Guide
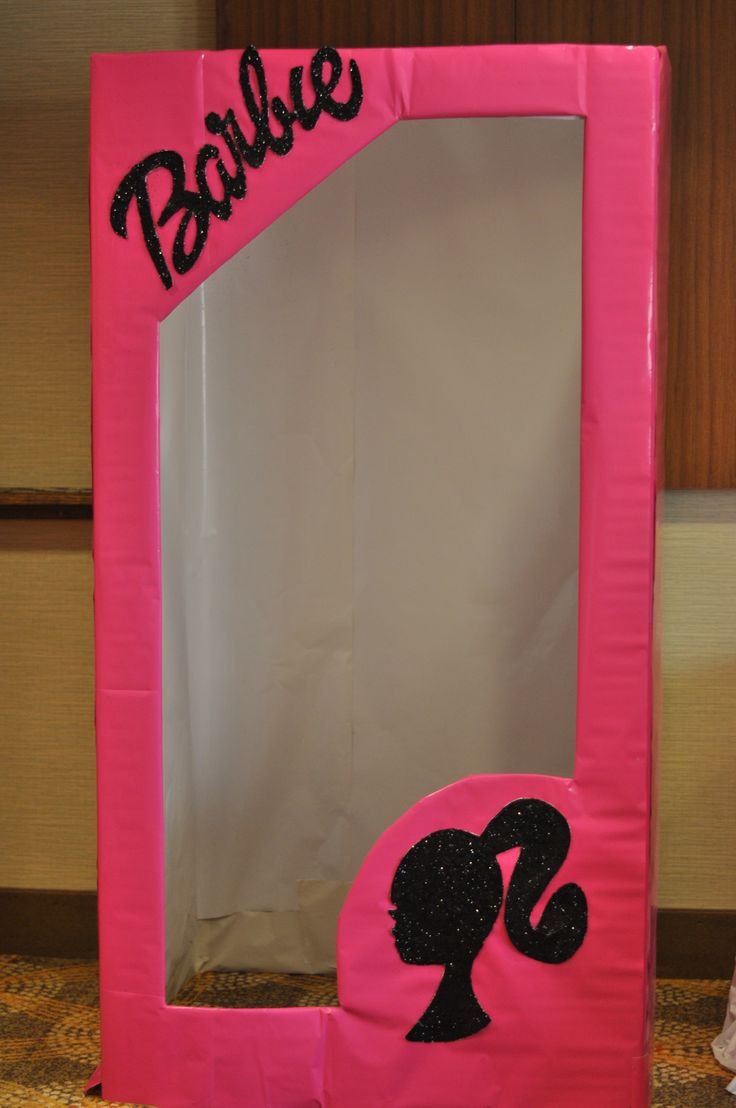
Are you planning a special event or simply looking for a unique way to celebrate your love for Barbie? A life-size Barbie box can make a stunning centerpiece and a memorable experience. This blog will guide you through the process of creating a life size barbie box, from conceptualization to execution.
Why Choose a Life-Size Barbie Box?
A life-size Barbie box is more than just a decorative item; it’s a statement piece. Whether you’re organizing a Barbie-themed party, a photo shoot, or a special event, this oversized replica adds a touch of glamour and fun. It’s also perfect for birthday celebrations, store displays, or even as a unique gift for a Barbie enthusiast.
Materials You’ll Need
To create a life-size Barbie box, you’ll need the following materials:
- Cardboard or Foam Board: These will serve as the main structure of your box. Ensure they are sturdy enough to hold up the box.
- Paint and Brushes: Choose bright colors typical of Barbie packaging.
- Glue and Tape: To secure the pieces together.
- Cutting Tools: For precise cutting of the cardboard or foam board.
- Decorative Elements: Stickers, ribbons, and any other embellishments that fit the Barbie theme.
Steps to Create a Life-Size Barbie Box
1. Plan Your Design
Before you start, sketch out your design. Decide on the dimensions of your life-size Barbie box. A typical Barbie box is about 3 feet wide, 6 feet tall, and 1.5 feet deep, but you can adjust these measurements to suit your needs. Consider the colors and patterns you want to use, keeping in mind Barbie’s iconic pink and white packaging.
2. Prepare the Cardboard or Foam Board
Cut the cardboard or foam board into the panels required for the box. You’ll need four side panels, a top panel, and a bottom panel. For a more authentic look, you might want to cut a front panel with a large window that mimics the classic Barbie box design.
3. Assemble the Box
Start by assembling the sides of your life-size Barbie box. Use glue and tape to secure the panels together. Make sure the structure is stable and all corners are properly aligned. Attach the top and bottom panels in the same manner.
4. Decorate the Box
Once the box is assembled, it’s time to add color and details. Paint the box in Barbie’s signature colors. Add details such as the Barbie logo, product information, and any other design elements. You can use stickers, ribbons, or even printed images to enhance the look.
5. Add Finishing Touches
For a polished finish, consider adding a glossy coat or some clear protective spray to give your life-size Barbie box a shiny appearance. If you want the box to be functional, like a photo booth or a display, make sure there’s an easy way to access the interior.
Tips for Success
- Measure Twice, Cut Once: Double-check your measurements before cutting to avoid mistakes.
- Use High-Quality Materials: Invest in good-quality cardboard or foam board for a more durable box.
- Get Creative: Don’t hesitate to add personal touches or custom elements to make your life-size Barbie box unique.
Conclusion
A life-size Barbie box is a fantastic way to add a touch of whimsy and elegance to any event. With a bit of creativity and the right materials, you can create a show-stopping centerpiece that will delight guests and make any occasion special. Whether it’s for a party, a photo shoot, or a unique gift, a life-size Barbie box offers endless possibilities for fun and creativity.


